
We SEE YOU week 3! And you’re only giving us mild panic attacks because deadlines don’t stand a chance against Team KPV! [insert hyperventilating cries here]. As always, be sure to check out the progress of all of the other incredible room transformations over at the One Room Challenge!
This week I want to talk a bit about materials and give you a sneak peek of our floor. Then I want to take you through the first steps of the construction process post-demolition. We were super lucky to hook up with some amazing sponsors for this kitchen renovation, and I need to be perfectly candid with you about how they came to join us on this journey. In short, we chose THEM, not the other way around! So when I tell you they kick so much a$$, I want you to really believe me.

As I mentioned in the previous post, the first part of the kitchen that was chosen was that dreamy blue stove and we were so grateful to get Hallman to come on board as a sponsor to make that stove even more special with some great features. So, consider this stove as our jumping off point for the rest of the kitchen. I have spent the 17 years of my adult life dreaming of kitchens, and the first thing that always came to mind when dreaming was that statement stove, but did that mean that every other element in the room would have to bow down to that splash of blue? Hell to the NO.
The next crew to come on board was Boho Luxe Home. I had worked with them and their gorgeous pillow line before, and I was beyond excited when they offered their stunning fabrics for our Roman shades. We put a lot of work into the windows in this space by not just adding completely new windows and new locations for them, but by more than doubling the size of our main window. It was so important to us that this kitchen was bathed in as much natural light as possible, and we wanted to draw the eye to this element, and balance that blast of blue in the stove with another gaze-attracting feature. We decided to go with their Moroccan Knot fabric, and I am super stoked to see them completed when they get installed next week!

So, bright blue stove, wild Moroccan fabric…. now where do we go? My overall vision for this kitchen was to have some strong boho eclectic vibes, but there are so many directions to go beyond that point: gold glitzy ritzy eclectic? Or earthy, hippie boho? I love both of those extremes so much, so I wanted to try to meet somewhere in the middle. If I could choose a single sentence to define my entire interior style, it would be that I don’t like settling for ANY single style. The main challenge is making totally disparate styles work together in a cohesive way. And that, in a nutshell, is what this kitchen is striving for.
Our next sponsor, Build.com, helped us add a little bit of that glamor I speak of. We decided to go with a brushed gold faucet, with a matching pot filler, to pull from those brass elements on the range, and to add a touch of high class to the space. We chose the Moen line for their stellar track record and their beautiful finishes. We can’t wait to see them installed tomorrow!

It was at this point in the process that I decided to step back and really take a hard look at the direction I wanted things to go. I am NOT someone who plans an entire space in a CAD program before breaking ground. That just doesn’t work for me. I always start a room by choosing the element that is most important to me (perhaps a bed frame in a master bedroom? or a rug in a living room?) and then I work from there. I find it to be a much more organic process, but the downside is it takes much more time. I like to SEE certain features in a room before adding to the layers. And oftentimes, inspiration comes from a visit to my local thrift store, and not from a West Elm catalog. The unpredictability of the process is what excites me most about designing spaces.
Although I wasn’t able to visualize almost any elements before having to choose nearly all of them, I was still able to move through the process by being intentional about every step, and decided to add layers in the order of what was most important to me in the room. I knew I wanted those glitzy fixtures, but in order to counter those pops of gold, that bright fabric, and that fancy stove, I knew we needed to tone it down somehow. In order to achieve this, we decided to add some authentic reclaimed wood to the room. I love the versatility of wood, and it can really work in almost any type of space. I’ll get more into how and where we decided to add these touches of reclaimed wood next week. For now, I’ll let you know that we decided to go with a dark, sumptuous stain to allow the wood to dance alongside those more glamorous elements, all the while allowing the rusticity of the wood itself to make the entire space more approachable.

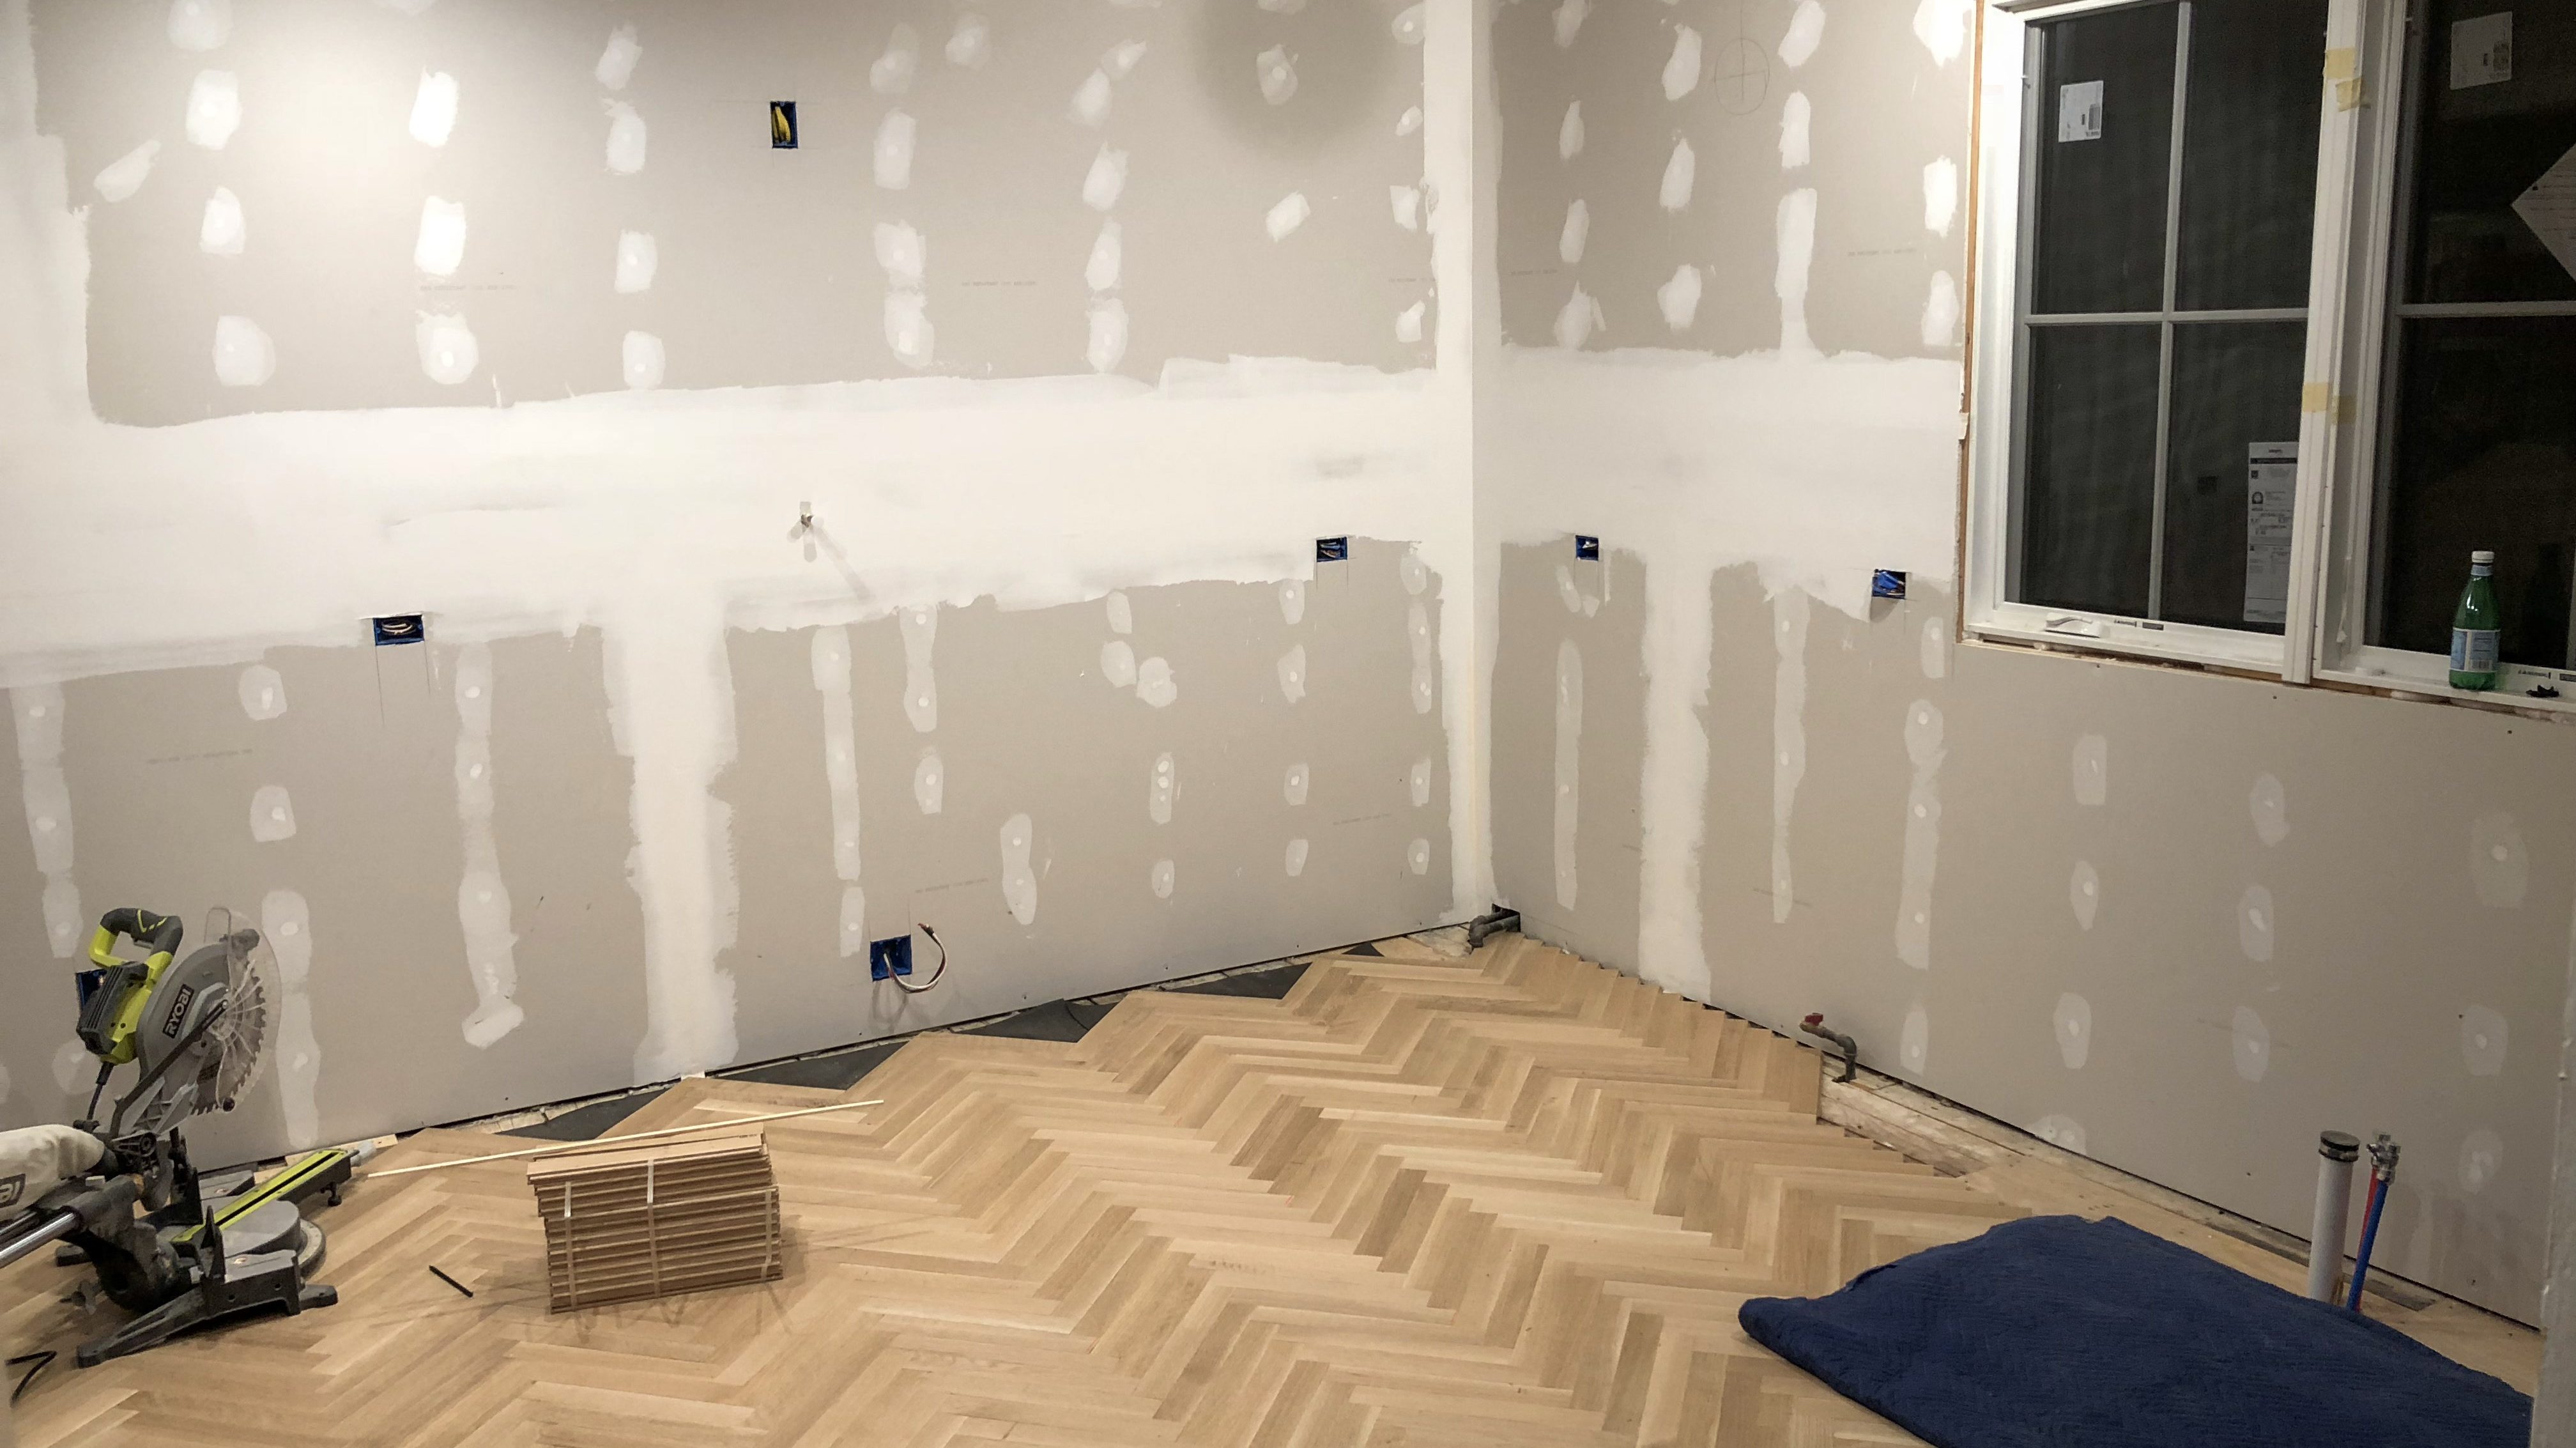
This was about where we stood half-way through the process on the design end, so now let’s chat for a moment about what started to evolve on the building side, post-demolition. Once our two month (plus)-long demo process was complete, we needed to sheetrock the entire space (ceiling included). As I had mentioned in the last post, the entire space was plaster and lath, and we opted to tear all of it out to make the electrical work more seamless. Now, this is where we struggled a bit being an essentially one-man team. Billy (my builder hubbie) did not have the proper equipment or man power to sheetrock a ceiling, so we decided to give the man a well-deserved break and hire this one out. Our contractor did an amazing job bringing this room back from the dead, and we were finally able to take a few deep breaths after seeing the walls and ceiling replaced in the room.
The next obstacle? FLOORING. Now, these floors are possibly my favorite element in the room, while my husband has come to abhor them after they took an obscene amount of time to install. I might remind you that we had three layers of floor to demo before reaching our subfloor (which needed major repairs), so finally seeing a beautiful floor under our feet was INCREDIBLY rewarding. And I have to give a MAJOR MAJOR shoutout to the hubs for making my herringbone floor dreams come true. I was a big brat about the floor. It was herringbone or the highway for me, and he didn’t even argue because he must have just known how amazing they were going to look too (love yah babe! 😉 ).

So, this is about where we were mid-construction and mid-design, and we had all kinds of wonderful and terrible surprises in store for us in the coming weeks…..
STAY TUNED.


Kate, that floor is ah-mazzzzzz-ing!
That stove and the flooring are both SO gorgeous!! Can’t wait to see it all come together!
Dang those floor is a show stopper! I am obsessed with how it turned out. I’m excited to see the cabinets installed 🙌